


|
|
|
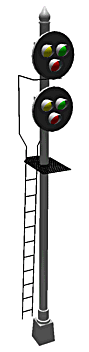
TrackPlanning.com NY Signal drawn
|
Prototype railroads compute the amount of superelevation for a given curve from the speed the will be used through the curve. One equation that provides the superelevation in inches from the speed in miles per hour is: Height = 4 * Speed * Speed / RadiusInFeet For a 4000' radius curve expected to maintain 60 mph traffic, this results in a superelevation of 3.6 inches. And it's not uncommon to see a superelevation of 3-4 inches on an American prototype track. The US Federal Railway Administration limits superelevation to 6 inches. Faster trains in Europe sometimes augment superelevation with an active suspension that further tilts each railroad car up to 7 degrees. Now, a model layout has no real need for superelevation; there simply is not enough mass for it to have a noticeable dynamic effect. However, we can nicely model the prototype by keeping our superelevation consistent with the use of the track. A main line designed to support high-speed traffic could be superelevated by 4 scale inches as a matter of standard on the model. Branch lines could be superelevated only 2-3 scale inches, depending on their usage. Yard and industrial track is generally not superelevated. 4 inches is about 0.045 inches in height on an HO scale layout and 0.025 on an N scale layout. One convenient way to introduce superelevation in your layout is to cut small plastic spacers of the proper thickness and place them under the ties on the outside of curves. Sheet styrene is available in .005, .010, .020, .040 and other thickness values. Use one or more pieces of styrene to achieve the desired superelevation. Superelevation and EasementsJust as we would not feel comfortable if we were in a car and suddenly jerked into a tight circle, we would not want to have superelevation suddenly lift one side of the train. The prototype introduces the superelevation evenly along the easement for the curve. The two work hand-in-hand to gradually tilt the car as it gradually eases into a tighter turn. Since an easement changes the radius linearly along its length, it is correct to introduce the superelevation linearly also. The effect is one of an increasing radius and an increasing height changing together. It feels right to the passengers, and properly balances the extreme forces found on the prototype. After you locate an easement on your layout, mark its ends so you'll know where the are when it comes time to lay track. Then, as you lay the track around the curve, gradually increase the height of the outside rail through the easement by adding pieces of styrene under the ties. Space the styrene pads regularly and increase their thickness an equal amount each pad until you reach the maximum superelevation at the end of the easement. When you apply ballast, the pads will disappear and the superelevated track will look just like the realroads. Try superelevation on your layout. The trains look great as they tilt into the curves. It's satisfying to watch, and satisfying to know you've modeled yet another aspect of railroading properly. |
|
Send mail to 3pi@TrackPlanning.com with
questions or comments about this web site.
|
 One feature
of prototype railroads that isn't often modeled is Superelevation. A
track is said to be superelevated when one rail is higher than the other through
a curve. Raising one rail tilts the train as it passes over, banking it into the
turn much like an airplane. This allows the train to transit the curve at higher
speeds and greater comfort than possible without superelevation.
One feature
of prototype railroads that isn't often modeled is Superelevation. A
track is said to be superelevated when one rail is higher than the other through
a curve. Raising one rail tilts the train as it passes over, banking it into the
turn much like an airplane. This allows the train to transit the curve at higher
speeds and greater comfort than possible without superelevation.